The following workflow example demonstrates how to add a custom comment workflow to Pyramid. It is a basic setup mimicking what the built-in conversation and annotation tools already do. In the marketplace, there is another example for a "Task" workflow that can be used as a reference.
Note: This feature is available with an Enterprise license only.
Walkthrough Example
Let us start designing our new Workflow. Create a new Workflow by pressing Add Custom Workflow in the Admin Console.
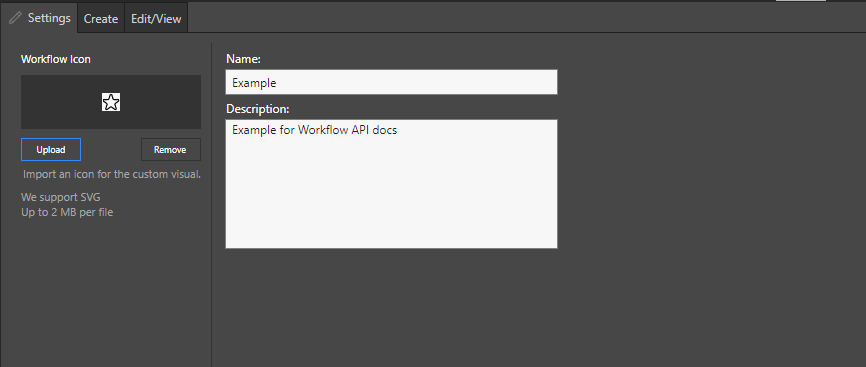
Start by adding the Workflow's Settings. Specify the Workflow's name and description and upload an icon for it.
Create Page
Next is to start building the Workflow's screens. We will start with the Create tab. From the Create panel, the user will create a new Thread from our Workflow's type.
The screen design begins with adding the screen's UI elements. Go to the HTML tab, by default you will see a "container" div, you can use it and code your needed HTML elements inside of it.
In our example, we'll add three inputs with labels, one for "subject", one for "description", and one for the "first comment":
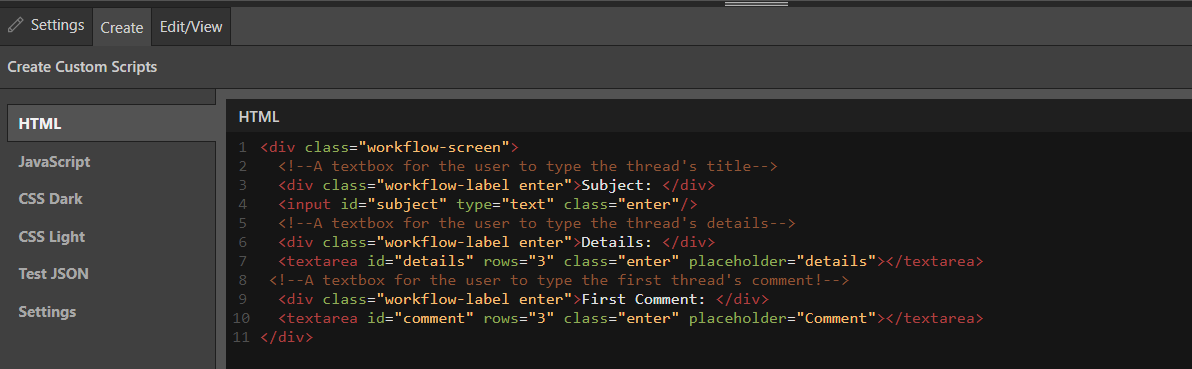
<div class="workflow-screen">
<!-- A textbox for the user to type the thread's title -->
<div class="workflow-label enter">Subject: </div>
<input id="subject" type="text" class="enter"/>
<!-- A textbox for the user to type the thread's details -->
<div class="workflow-label enter">Details: </div>
<textarea id="details" rows="3" class="enter" placeholder="details"></textarea>
<!-- A textbox for the user to type the first thread's comment -->
<div class="workflow-label enter">First Comment: </div>
<textarea id="comment" rows="3" class="enter" placeholder="Comment"></textarea>
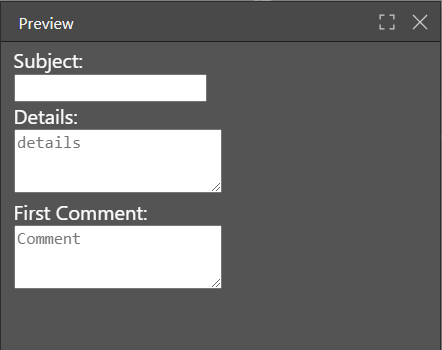
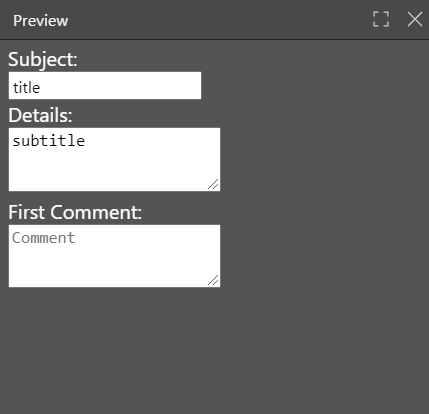
</div>Click Preview Light or Preview Dark to see how it looks:
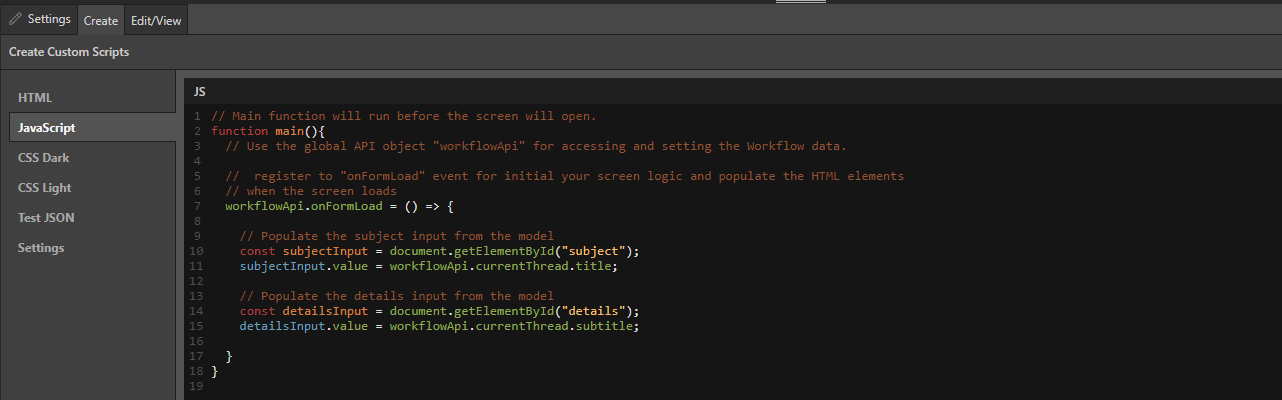
Next add the logic behind the UI. Go to the "JavaScript" tab. You will see a "Main Function", this function is triggered before the screen is loaded. We will use the Main function to implement our logic and register for necessary events with the help of the API object.
The global API object, 'workflowApi', contains objects, functionality and attributes for building your Workflow. In our example we'll register the "OnFormLoad" event and initialize our HTML elements.
The "OnFormLoad" event triggers after the screen is loaded, so we can integrate it our HTML elements. Here we are using the API object, "workflowApi," to retrieve the thread's data, and set it in the HTML form input elements.
// Main function will run before the screen will open.
function main(){
// Use the global API object "workflowApi" for accessing and setting the Workflow data.
// register to "onFormLoad" event for initial your screen logic and populate the HTML elements
// when the screen loads
workflowApi.onFormLoad = () => {
// Populate the subject input from the model
subjectInput.value = workflowApi.currentThread.title;
// Populate the details input from the model
const detailsInput = document.getElementById("details");
detailsInput.value = workflowApi.currentThread.subtitle;
}
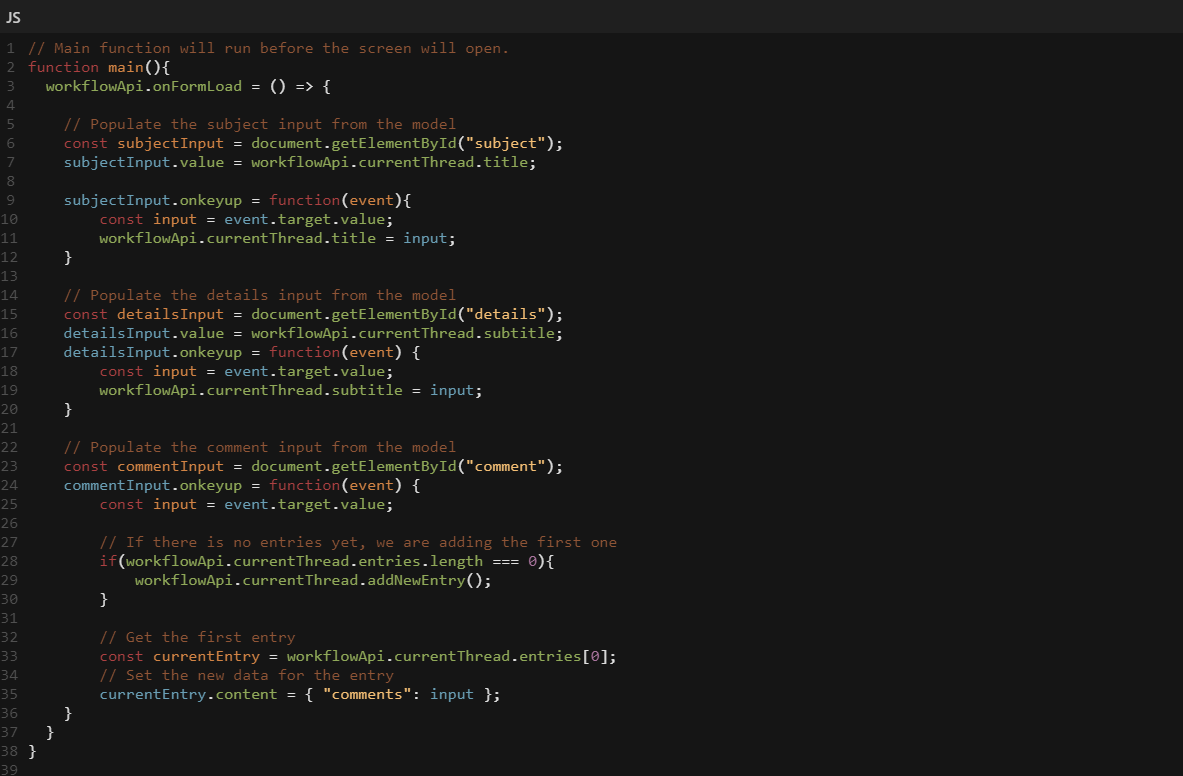
}We now register 'onkeyup' event, so we will update the thread and the first entry when the user changes the input's text.
// Main function will run before the screen will open.
function main(){
workflowApi.onFormLoad = () => {
	// Populate the subject input from the model
	const subjectInput = document.getElementById("subject");
	subjectInput.value = workflowApi.currentThread.title;
	subjectInput.onkeyup = function(event){
	const input = event.target.value;
	workflowApi.currentThread.title = input;
}

	// Populate the details input from the model
	const detailsInput = document.getElementById("details");
	detailsInput.value = workflowApi.currentThread.subtitle;
	detailsInput.onkeyup = function(event){
	const input = event.target.value;
	workflowApi.currentThread.subtitle = input;
	}

	// Populate the comment input from the model
	const commentInput = document.getElementById("comment");
	commentInput.onkeyup = function(event){
	const input = event.target.value;
	// If there are no entries yet, add the first one
	if(workflowApi.currentThread.entries.length === 0){
	workflowApi.currentThread.addNewEntry();
	}

	// Get the first entry
	const currentEntry = workflowApi.currentThread.entries[0];
	// Set the new data for the entry
	currentEntry.content = { "comments": input };
	}
  }
}
Next we check that our logic is working by clicking 'Preview' again. It should show the text for title and subtitle that we provided in the 'Test JSON' tab.
Next we will set the styles for the screens. Notice that there are two tabs for CSS styles: "CSS Dark" and "CSS Light". Both of those tabs represent CSS styles for the screen. Each CSS style set will be activated for its relevant theme in the system. In our example we will set the same CSS code for both.
We will set the width for the inputs, and a space between the inputs:
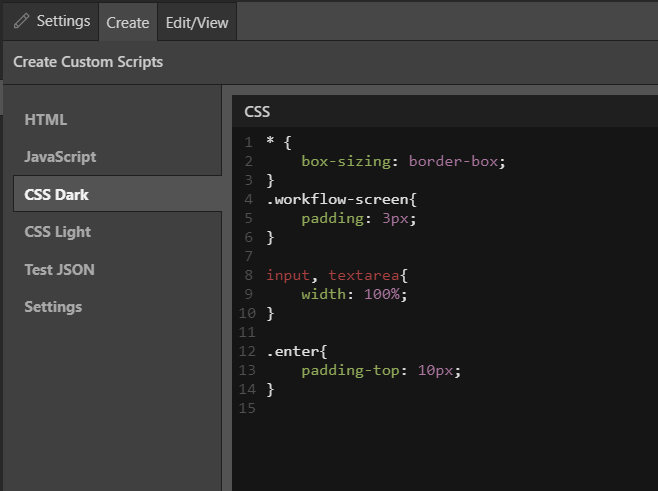
Clicking the "Preview Dark" button you can see that the styles are applied to the elements.
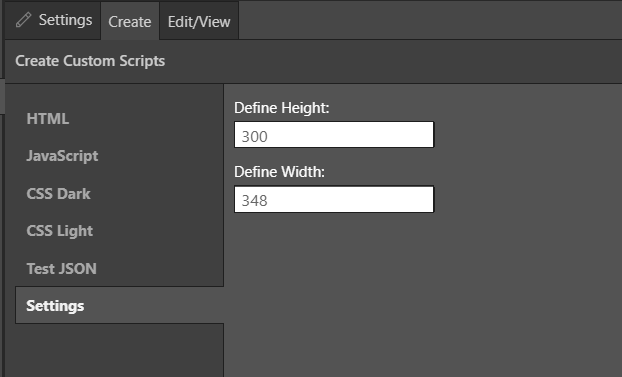
Lets next go to the "Settings" tab. Here we can manage the settings of the screen. In our example we going to set the height to be 300px.
View / Edit Page
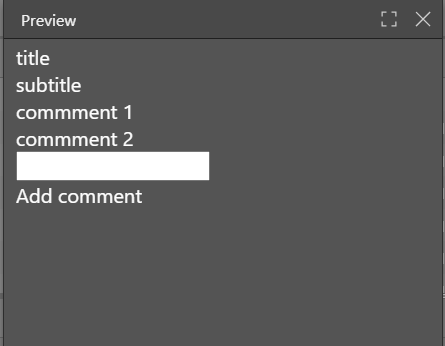
Now we'll design the "View/Edit" screen. In our example, when the user enters an existing thread they will see old comments and be able to add new ones. But they will not be able to edit the thread details.
Go to the "Edit/View" tab. We are repeat similar steps to the "create" screen. First we'll set HTML elements.
- The Thread attributes as read only labels: title and description.
- We'll show old comments that were added.
- Allow input and a button for adding a new comment.
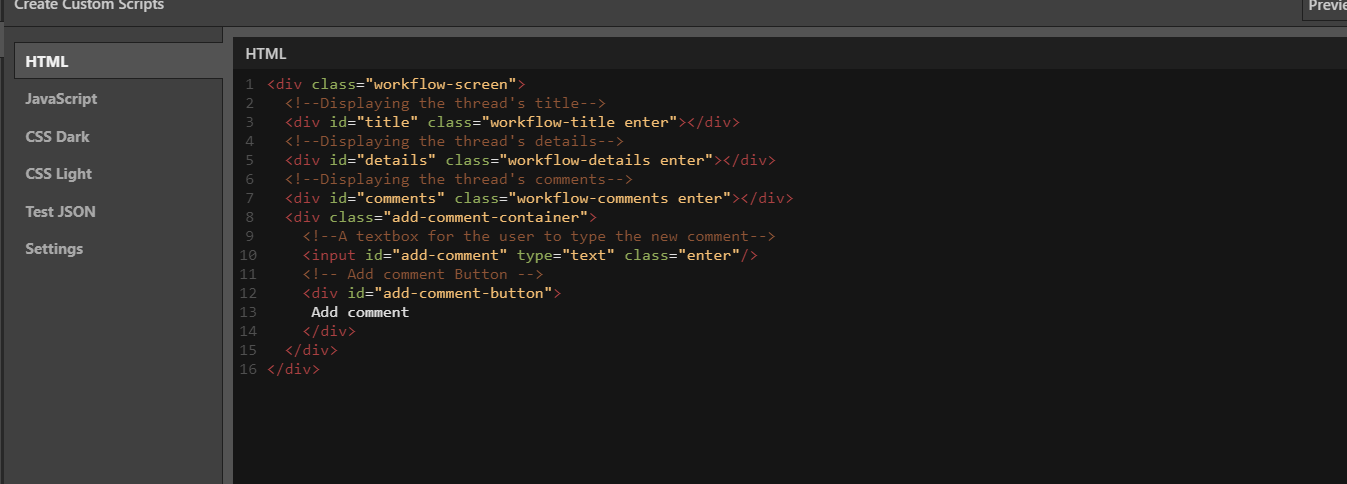
<div class="workflow-screen">
	<!-- Displaying the thread's title -->
	<div id="title" class="workflow-title enter"></div>
	<!-- Displaying the thread's details -->
	<div id="details" class="workflow-details enter"></div>
	<!-- Displaying the thread's comments -->
	<div id="comments" class="workflow-comments enter"></div>
	<div class="add-comment-container">
	<!-- A textbox for the user to type the new comment -->
	<input id="add-comment" type="text" class="enter"/>
	<!-- Add comment button -->
	<div id="add-comment-button">Add comment</div>
	</div>
></div>
Next for JavaScript. We will access the main API object and set the data for the input elements. We'll display all of the old comments on the screen and let the user add new comments. Notice that we implemented the "onClick" event for adding a new comment. When the user clicks the button we will set the new comment as a new entry and save the thread.
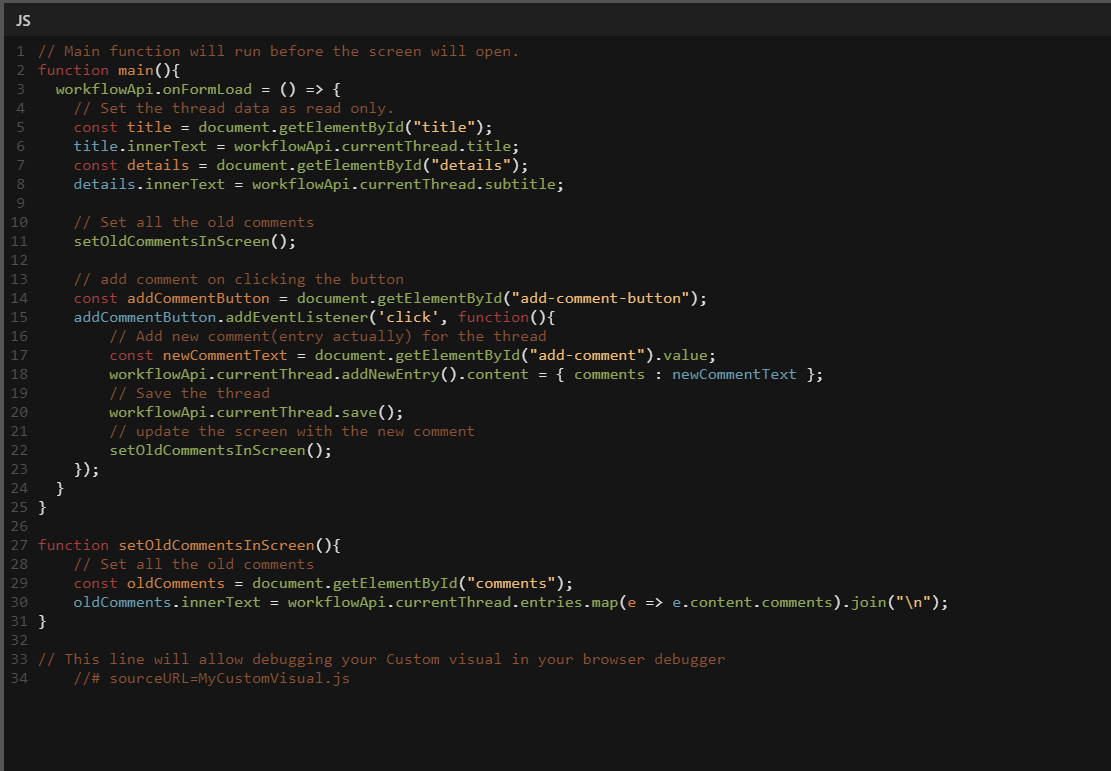
// Main function will run before the screen will open.
function main(){
	workflowApi.onFormLoad = () => {
		// Set the thread data as read-only.
		const title = document.getElementById("title");
		title.innerText = workflowApi.currentThread.title;
		const details = document.getElementById("details");
		details.innerText = workflowApi.currentThread.subtitle;

		// Set all the old comments
		setOldCommentsInScreen();

		// add comment on clicking the button
		const addCommentButton = document.getElementById("add-comment-button");

		addCommentButton.addEventListener('click', function(){
		// Add new comment(entry actually) for the thread
			const newCommentText = document.getElementById("add-comment").value;
			workflowApi.currentThread.addNewEntry().content = { comments : newCommentText };

		// Save the thread
		workflowApi.currentThread.save();
		// Update the screen with the new comment
			setOldCommentsInScreen();
		});
	}
}

function setOldCommentsInScreen(){
	// Set all the old comments
	const oldComments = document.getElementById("comments");
	oldComments.innerText = workflowApi.currentThread.entries.map(e => e.content.comments).join("\n");
}

// This line will allow debugging your Workflow in your browser debugger
//# sourceURL=MyWorkflow.js
To test the "View/Edit" page we need to change the "Test JSON" to include some comments. We'll add elements to the "entries" attribute to represent the old comments.
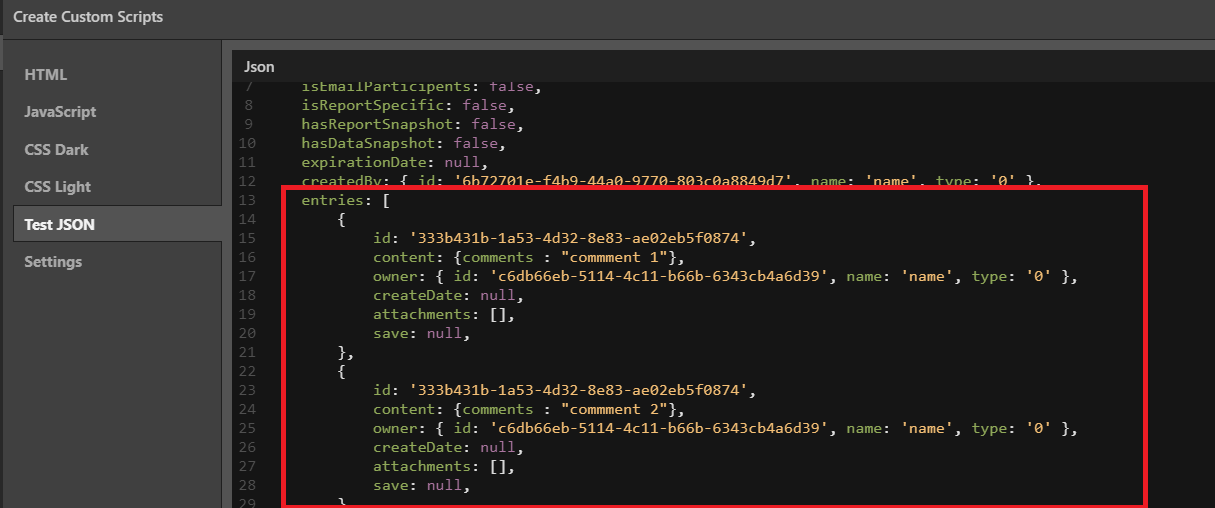
Now when we can "Preview" our code and see that the screen is showing the data that we just added.